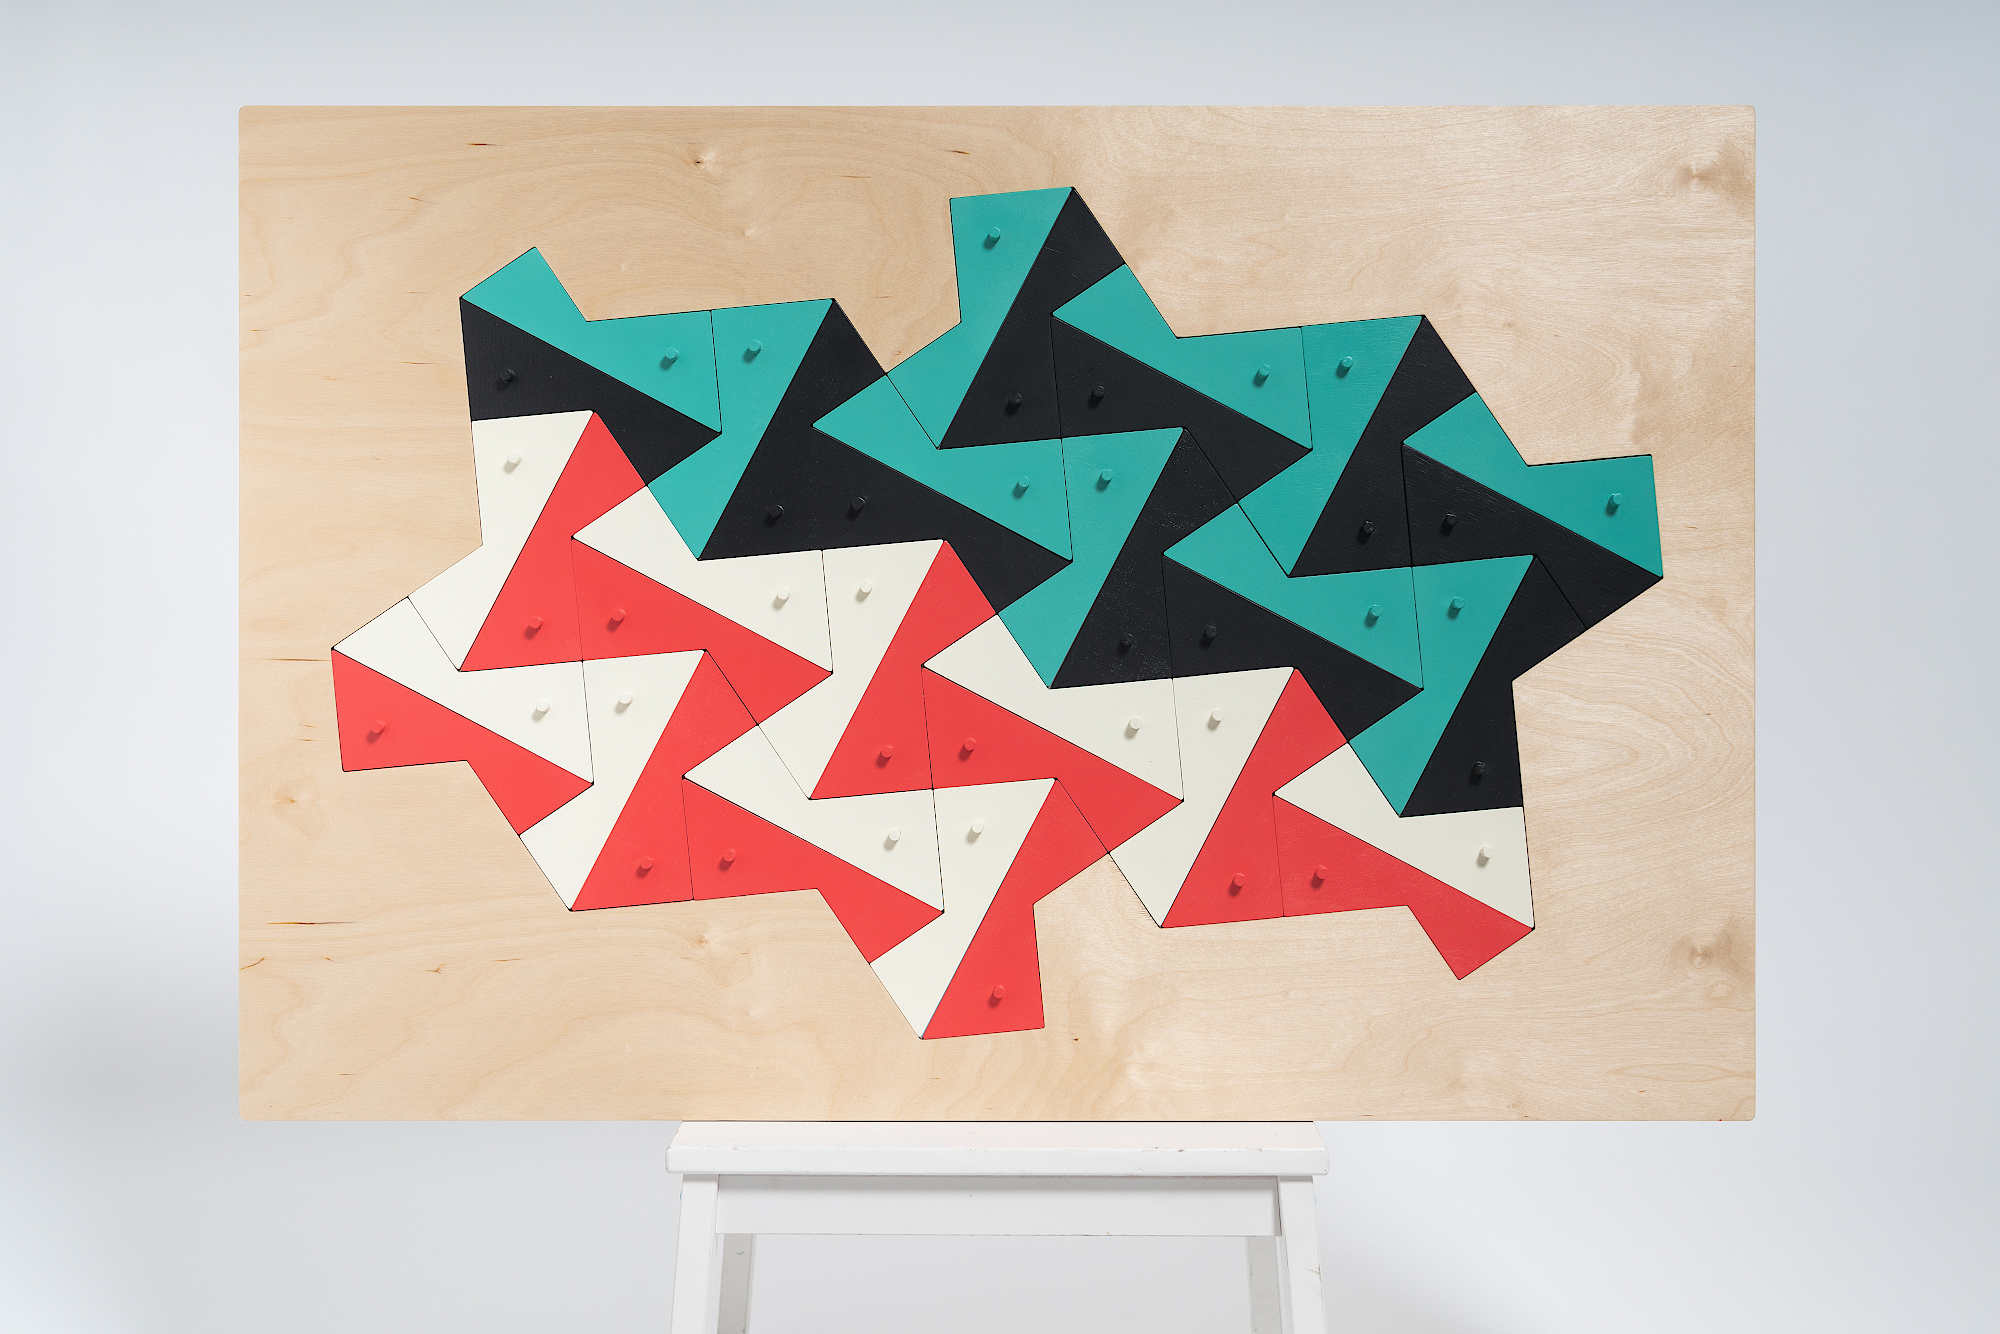
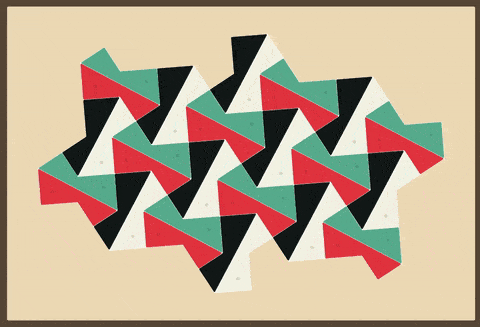
In this post, I’ll describe the process of creating a pentagonal tiling puzzle - from aimless tinkering to the initial idea, via prototyping to the final result. The puzzle, which measures about 65x100 cm, can be hung on the wall since all pieces are held in place by magnets.
This post mainly contains behind-the-scenes pictures. More pictures of the finished puzzle can be found here.
Pentagonal tilings
A tiling is a way of filling a plane by repeating one or more shapes with no overlaps and no gaps. Doing this with regular hexagons is easy and results in a familiar honeycomb pattern. With regular pentagons, it’s impossible. With identical, non-regular pentagons, there happens to be exactly 15 ways to do it1, three of which are shown below.
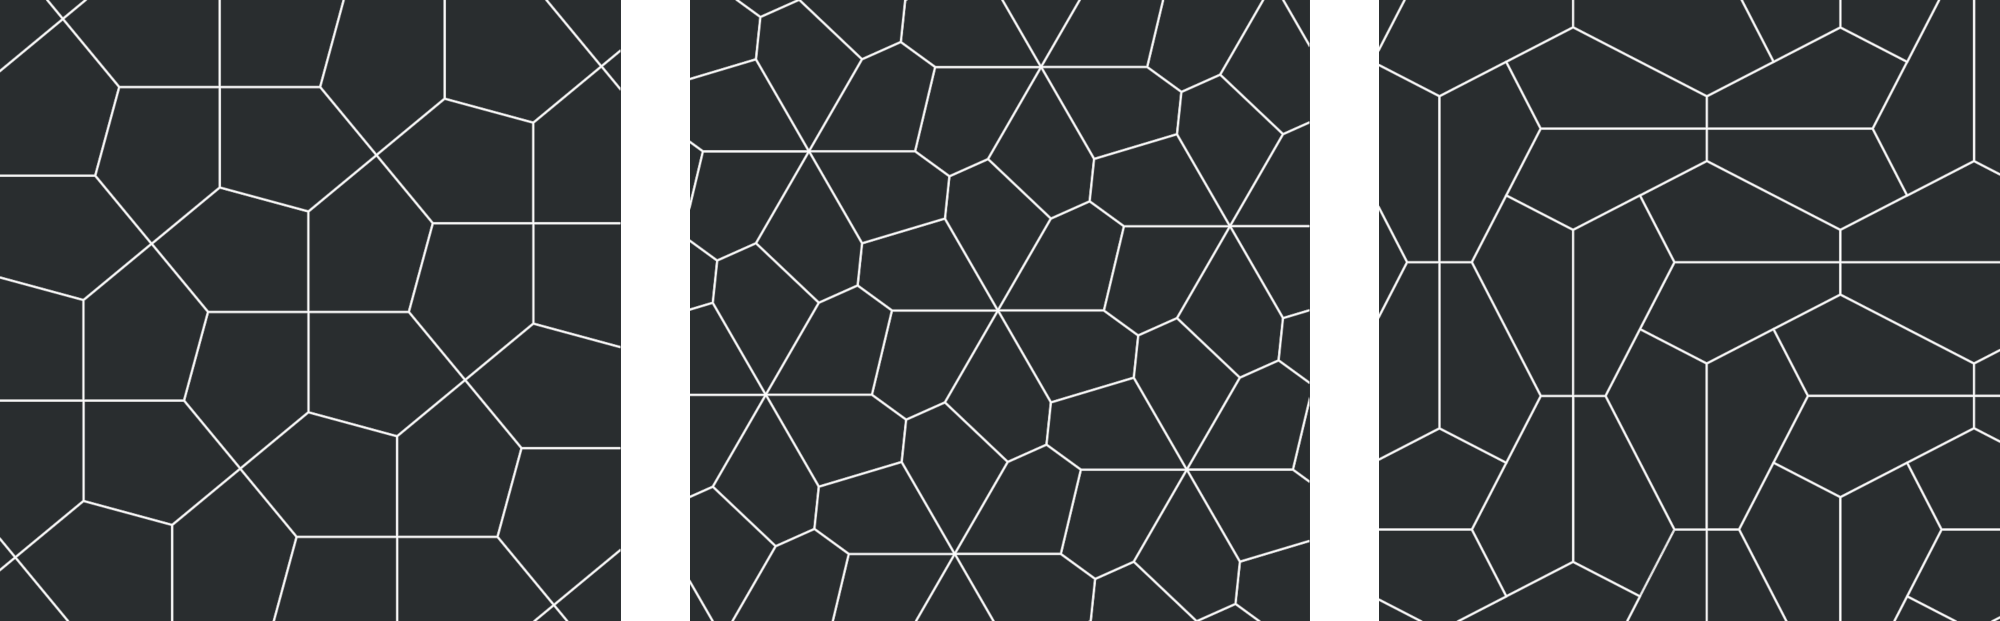
Three types of pentagonal tilings
For some of these 15 pentagonal tilings, the tile shape can be altered as long as certain geometric constraints are met. These tilings can be tought of as parametric, in that they allow the tile shape to be controlled by tweaking parameters, for example the length of a certain edge.
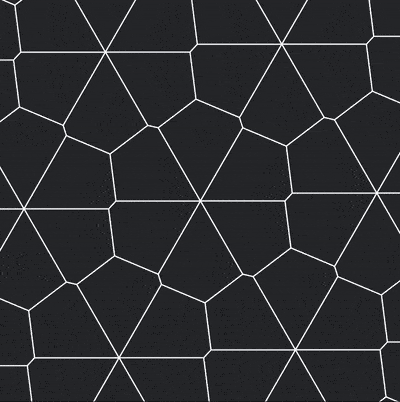
Controlling the shape of a pentagonal tiling by changing one of its parameters.
First prototypes
As I kept exploring pentagonal tilings, I felt it would be interesting to somehow turn them into physical objects. I didn’t have a clear vision at this point, but it seemed like a good idea to make some laser cut prototypes to see what it was like to interact with the tilings in real life.
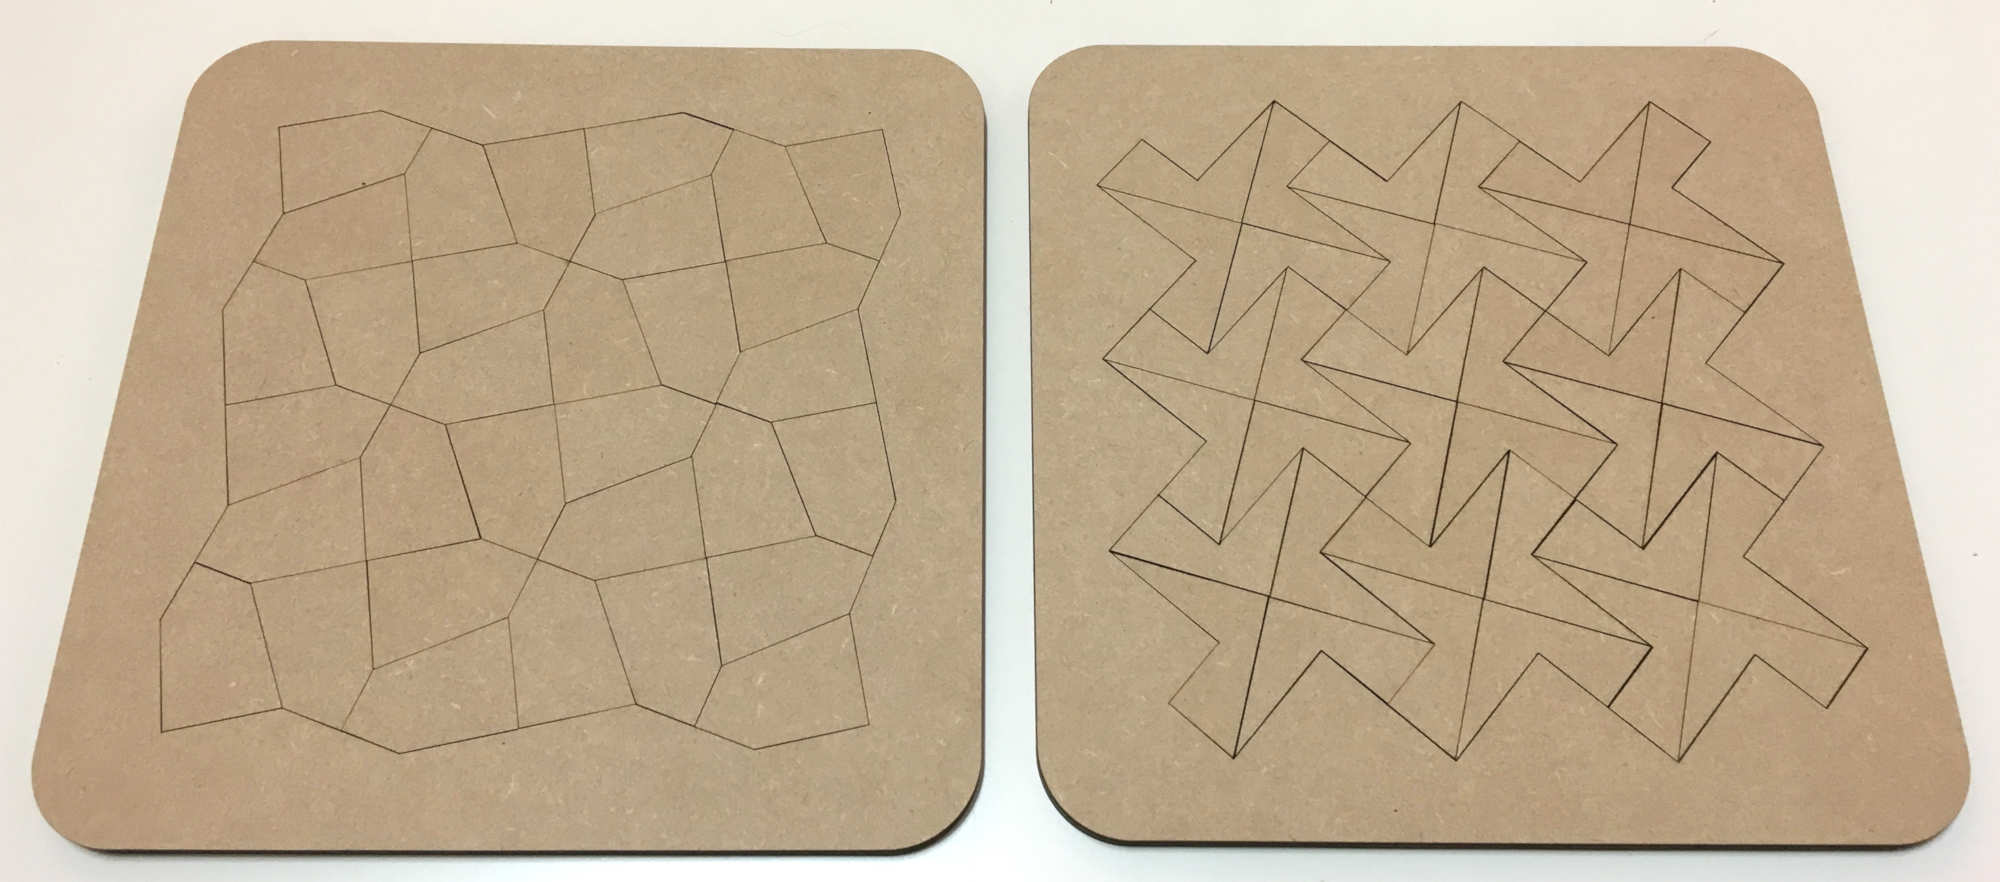
Two 30x30cm prototypes
I found it strangely relaxing to put the tiles in place and it required just the right amount of thinking to be rewarding without getting complicated. Since any tile can go in any position, there are lots of ways to complete the puzzles. However, if all tiles look the same, this degree of freedom is wasted so I started thinking of ways to assign colors to the tiles, hoping to add a creative dimension to the process of placing them.
The prototypes gave me some valuable insights and also made me feel confident that building a larger, more colorful pentagonal tiling puzzle was a good idea.
Towards the final design
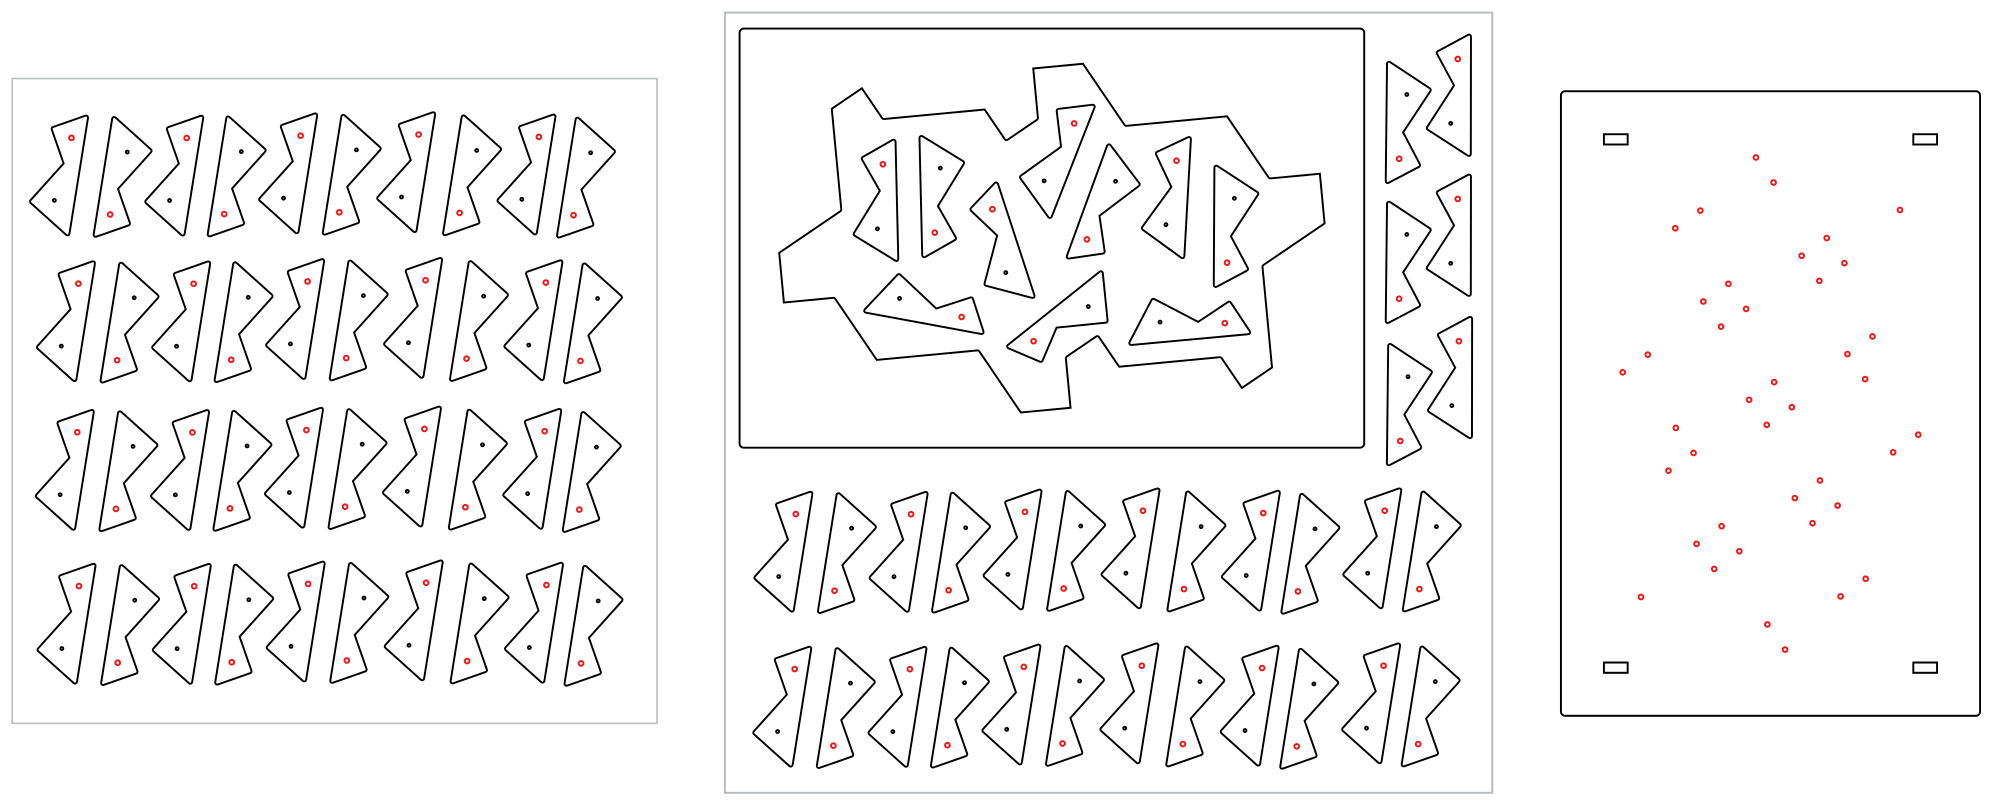
To help me explore tilings and tile colorings, I coded up an interactive tool showing a preview of the final puzzle. This tool exposed tiling parameters determining the tile shape, as well as various parameters related to manufacturing, such as the physical dimensions of the puzzle, the spacing between the pieces and the diameter of the magnet holes.
Interactively controlling the tile shape, the corner radius and spacing between pieces and the corner radius of the backboard.
After lots of parameter tweaking, I settled on a final design with room for 40 tiles and a palette of four colors. I decied to make 20 extra tiles in order to squeeze even more visual variation out of the puzzle.
Making the parts
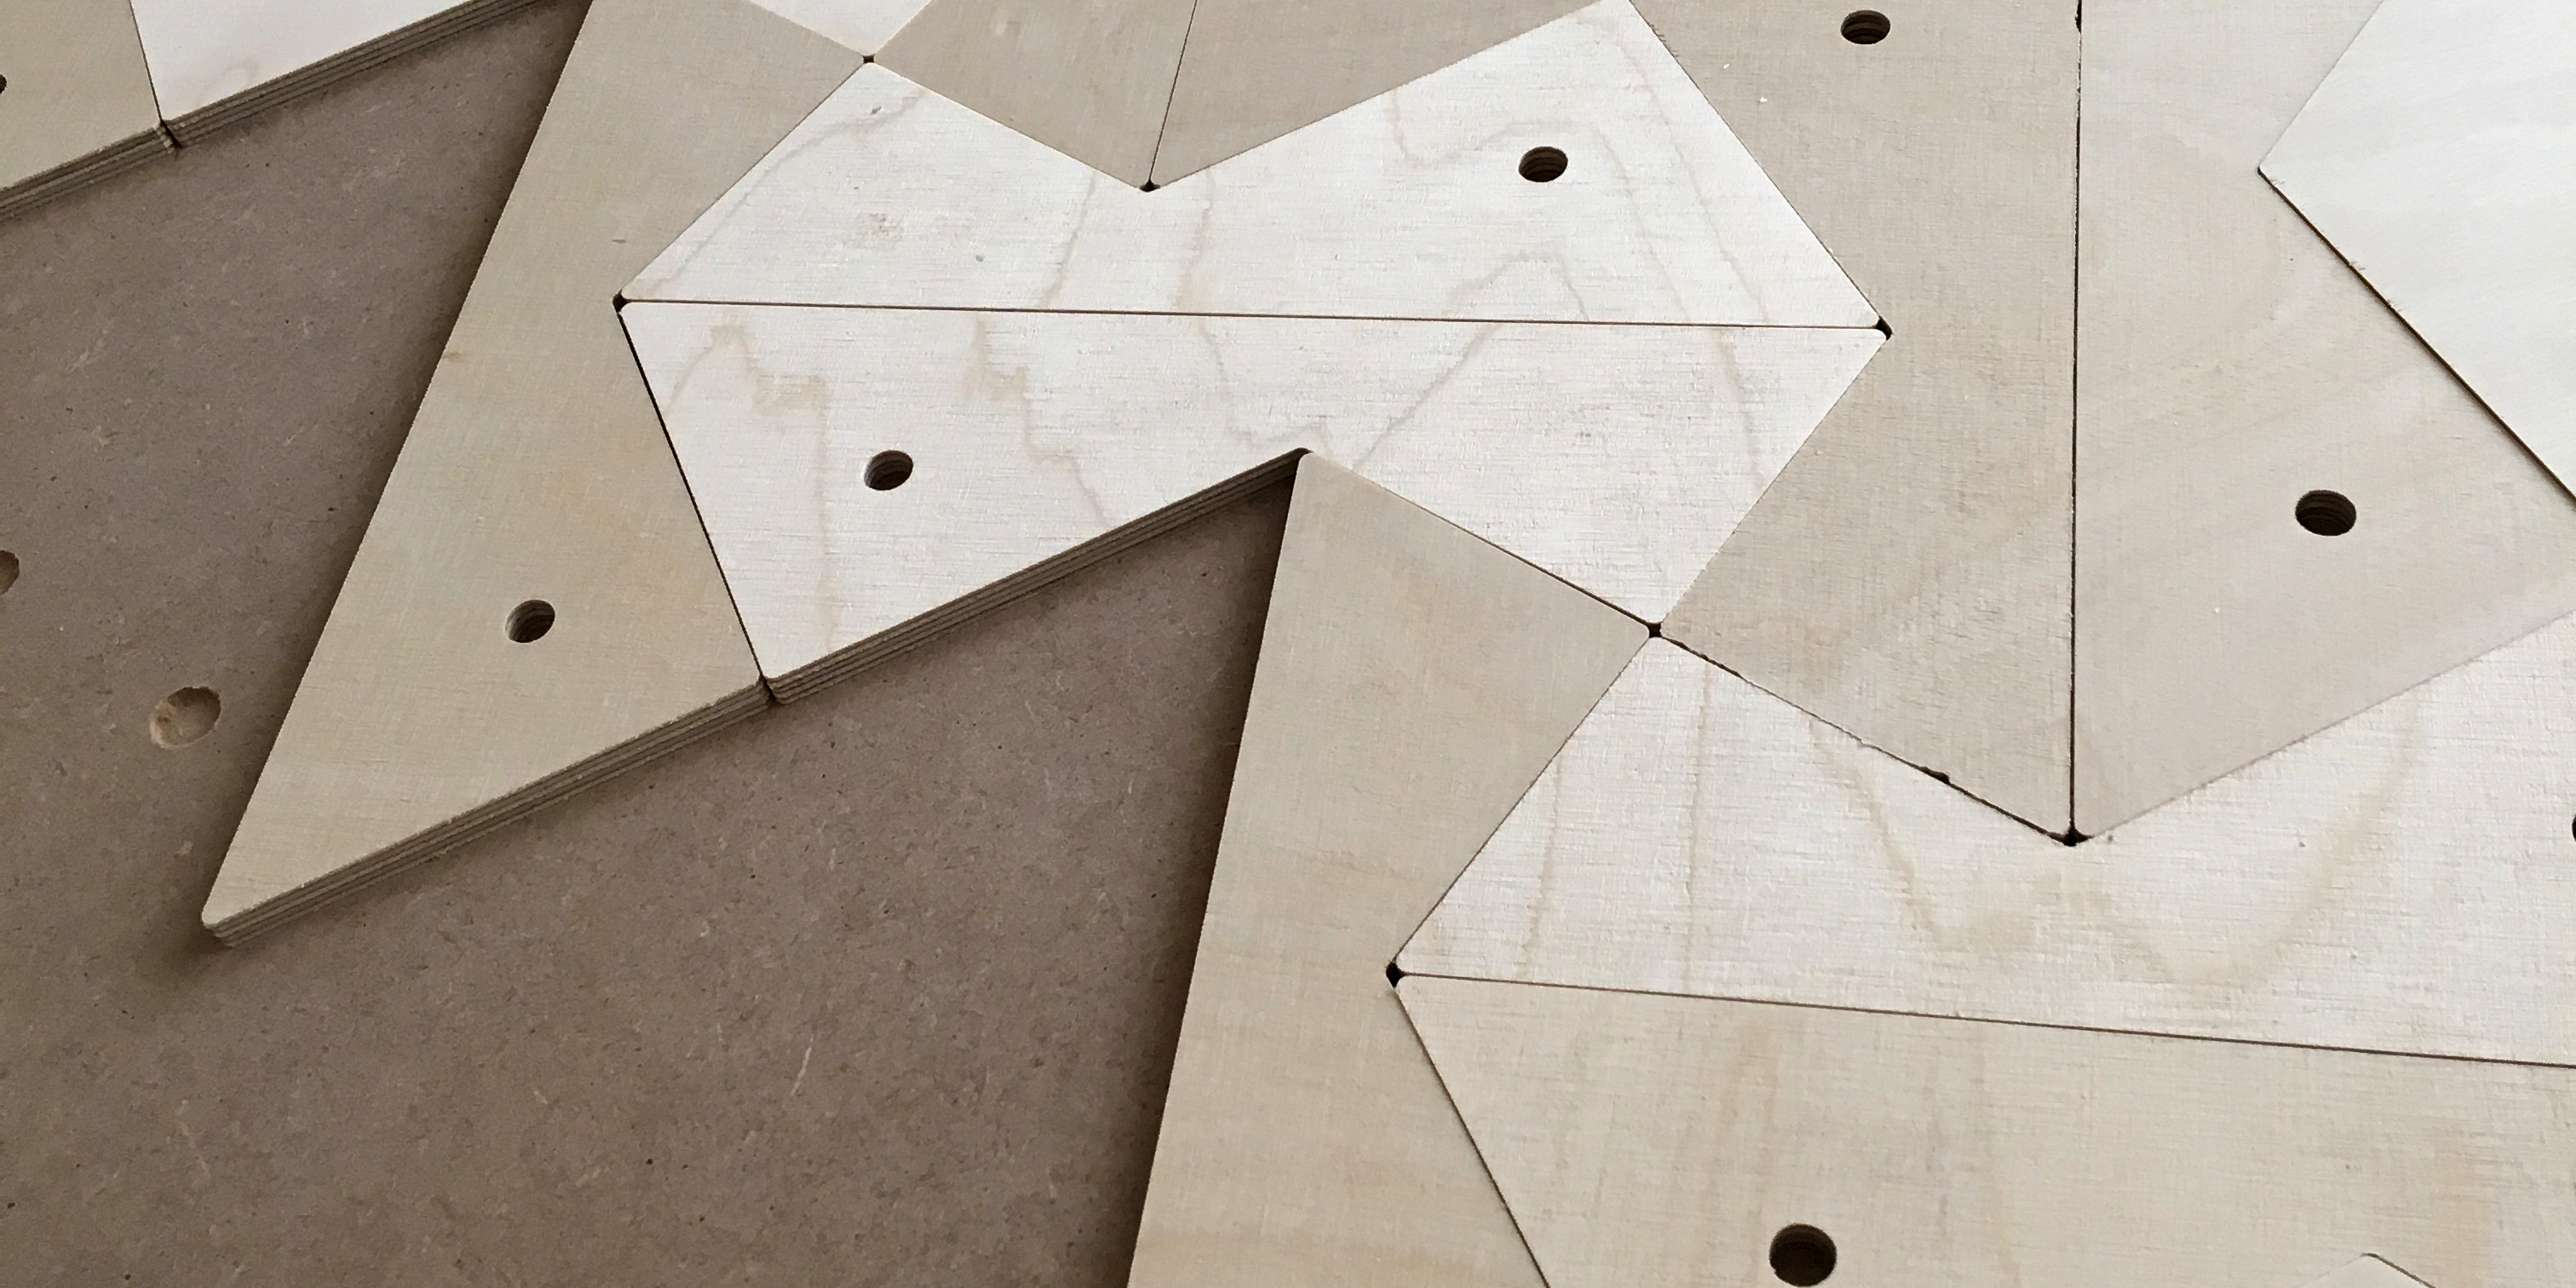
Since I wanted to put magnets in all parts except the frame, I needed to make lots of holes that didn’t go all the way through, but just deep enough to fit the magnets. This, and not wanting to deal with burned edges, were the main reasons I opted for CNC instead of laser cutting. One consequence of this choice was that I had to write some code to take into account the size of the cutting tool. To obtain a part with a certain outline, the tool path needs to be offset accordingly, as illustrated below.

A single piece with knob and magnet holes to the left and right, respectively. The black lines indicate the desired outline and the material removed by the tool is shown in gray.
I wrote some code for generating the basis for a final blueprint, handling all the geometrical intricacies. The manual labor required to create the final blueprint only consisted of duplicating and moving parts around to make sure I didn’t waste too much material.
Once I had generated the final blueprint, the only thing left to do was choosing materials for the parts. For the puzzle pieces and the frame, I went with birch plywood for a wooden feel. To minimize the risk of warping, I choose MDF for the backboard. Considering that the plywood frame only stayed flat for a day or two, this was probably the right choice. I let a local CNC shop take care of the actual manufacturing.
The final blueprint.
Assembling and painting
After confirming that the parts fit together as planned I proceeded to prepare them for painting. Since I went with a design with 40 pieces and also made 20 extra pieces, this involved lots of sanding. Note to self: a little bit of work times 60 equals a lot of work. Once all parts had been painted, I glued all the magnets in place and finally glued the frame to the backboard.
That strange feeling when your calculations turn out to be correct and everything fits together nicely
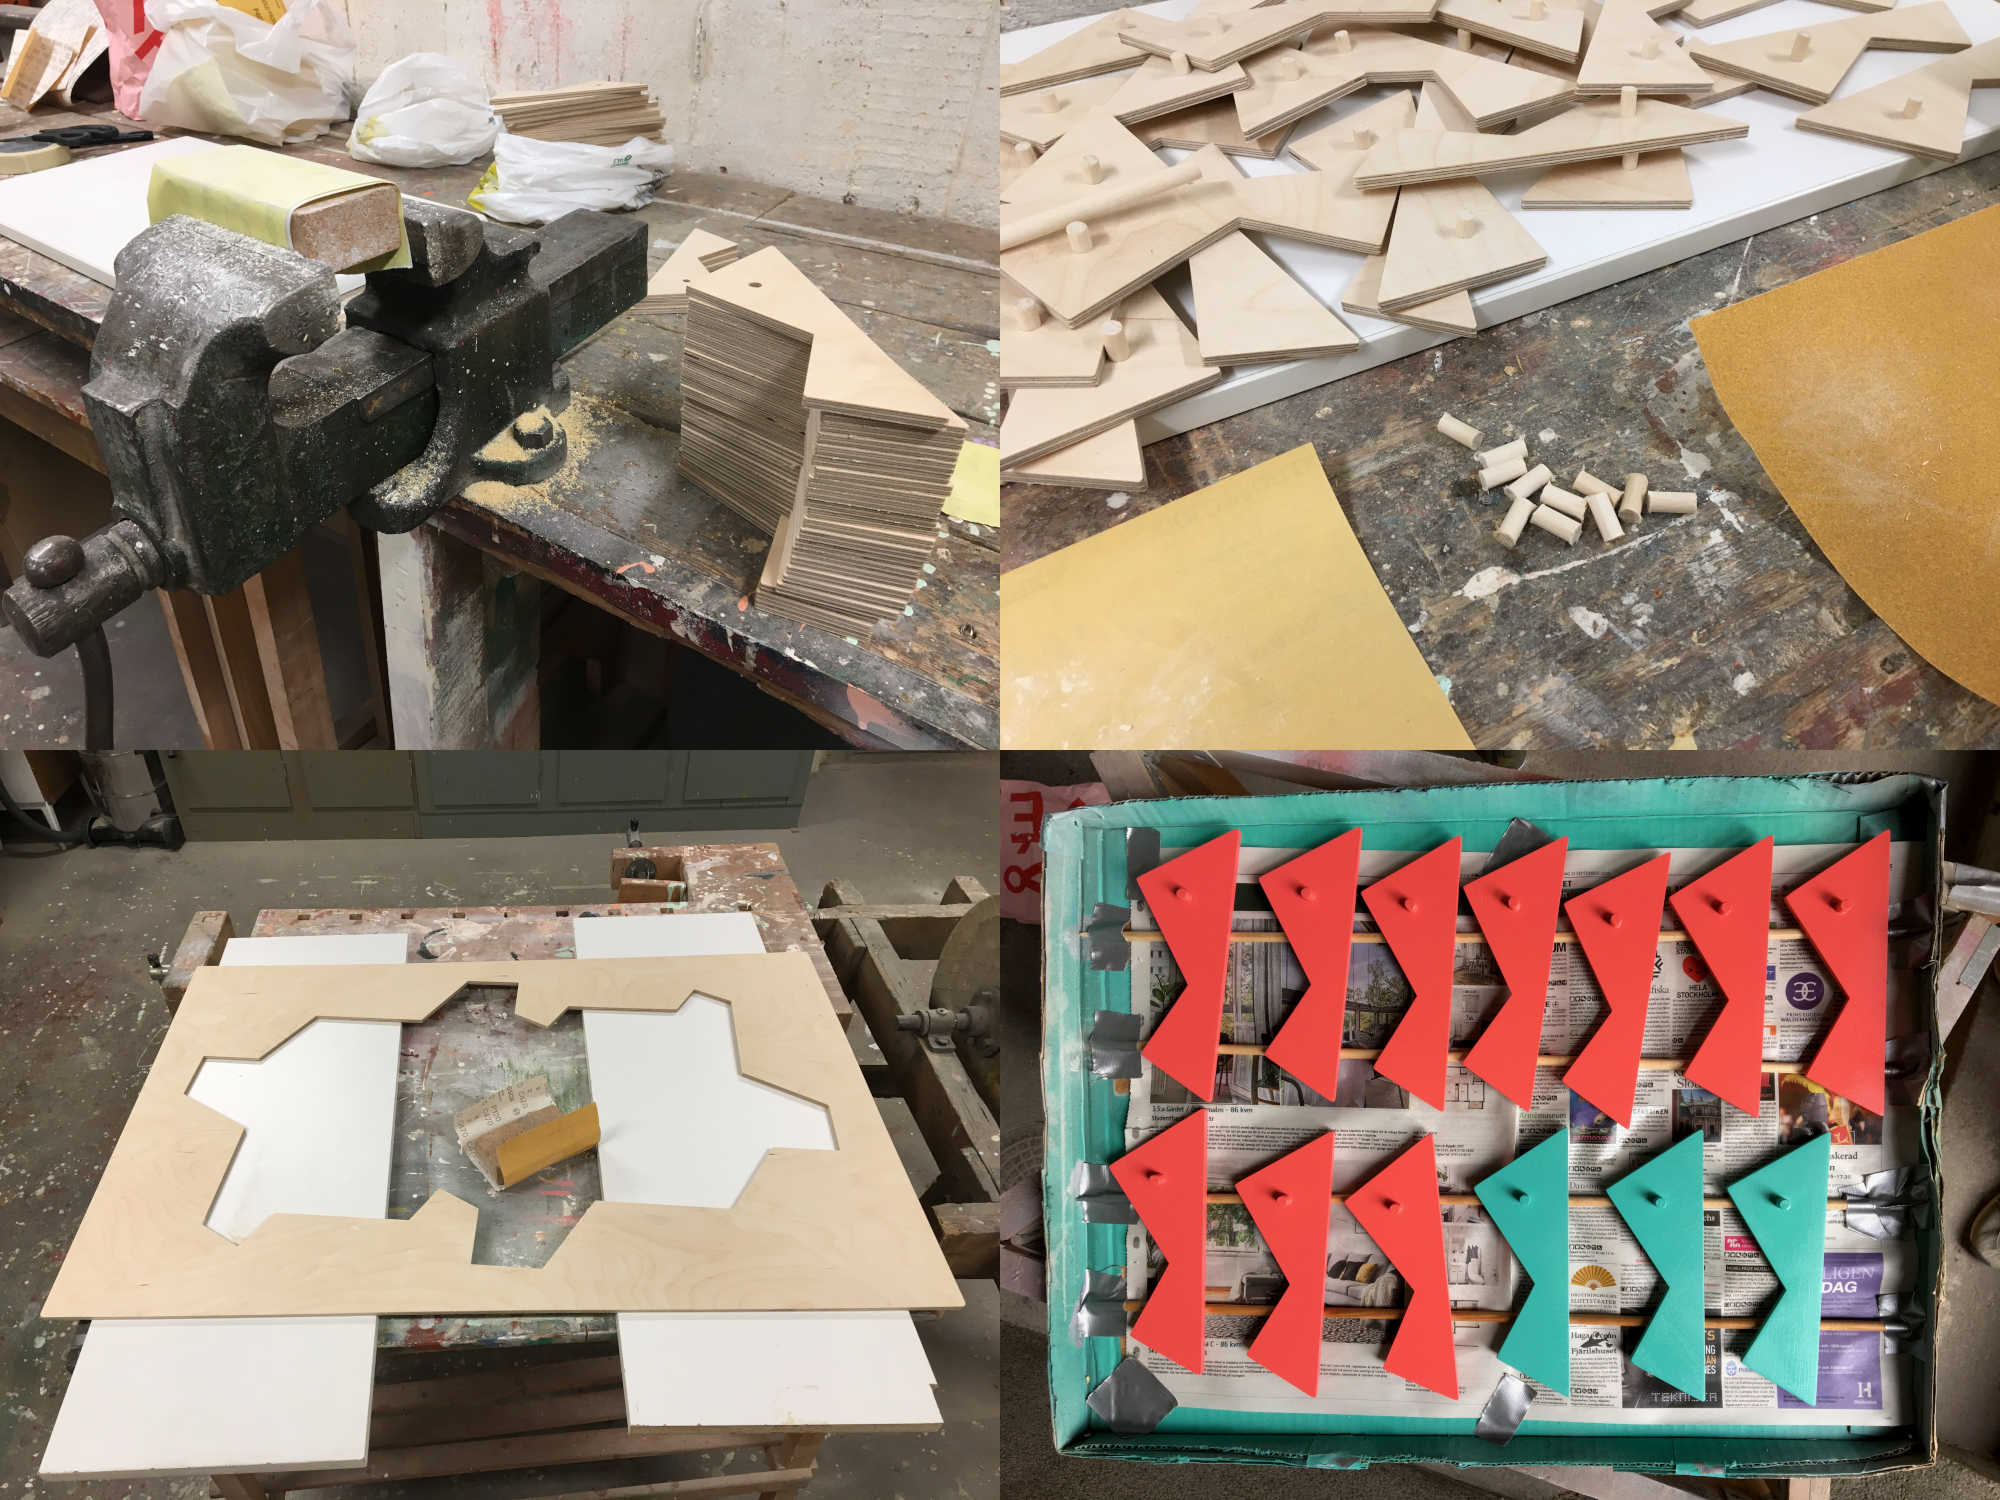
Sanding, sanding, sanding and spray painting.
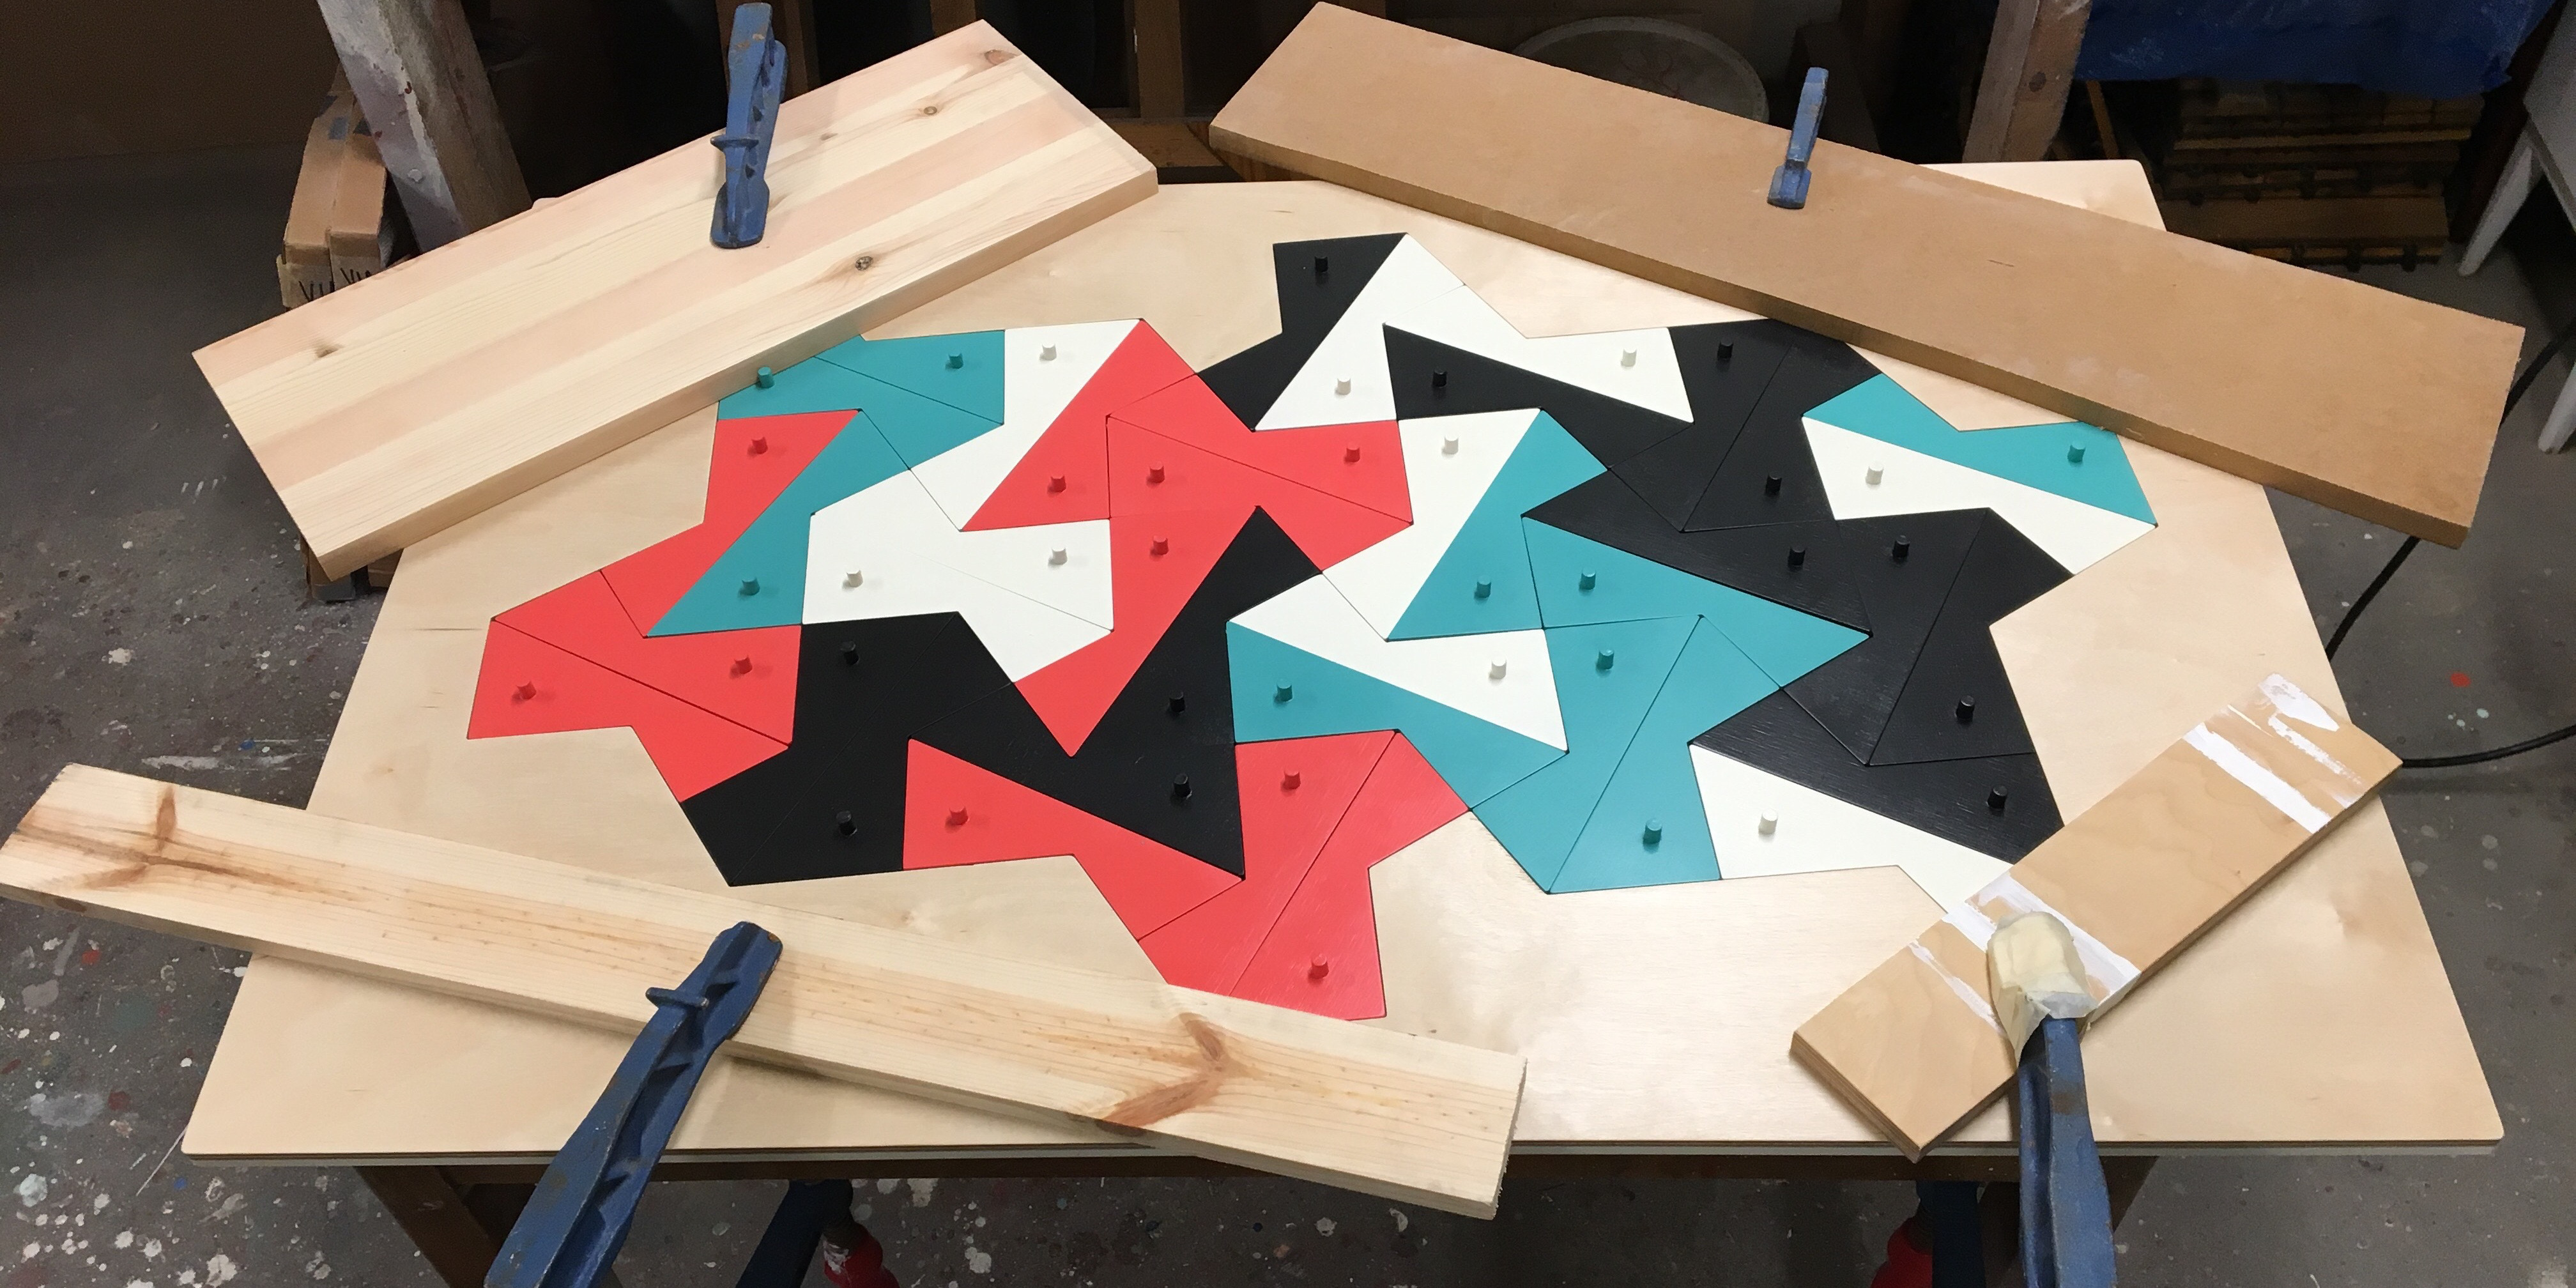
The point of no return: gluing the frame to the backboard.
Final thoughts
This was fun! And considering it was my first CNC project, it went surprisingly smoothly. I had some issues with splinters in some of the parts though. Apparently there are tricks for alleviating this problem. Guess I’ll add that to my list of things to learn for future projects.
It shouldn’t be too much work to adapt the tools I built to make puzzles based on other tiling types. This is something I might explore at some point, when the memory of all the sanding has faded.